Progress is slow right now for the finer details of building. We have been dealing with electrical and trying to get someone to look at it and say we are good to go for about 3 weeks! After several phone calls and emails, confusion, frustration, rain...We finally got the okay to cover the electrical on the outside. Currently, we are using plastic to cover the outside as we put in Roxul insulation in the walls.
 |
| Roxul Insulation being unloaded at our current residence |
We went with Roxul because it is non-toxic and resistant to critters and mildew. The neat fun fact, it is made from spun rock! I end up using a serrated knife to cut it and it seems to be rather easy to work with and install. In New Hampshire, you need R-19 in the walls but since we used 2x4 studs we could only get R-15 to fit. To add to our R value we are also using insulation foam board on top of the R-15, this will get us up to R-21.
 |
| Insulation foam board on top of Roxul insulation |
 |
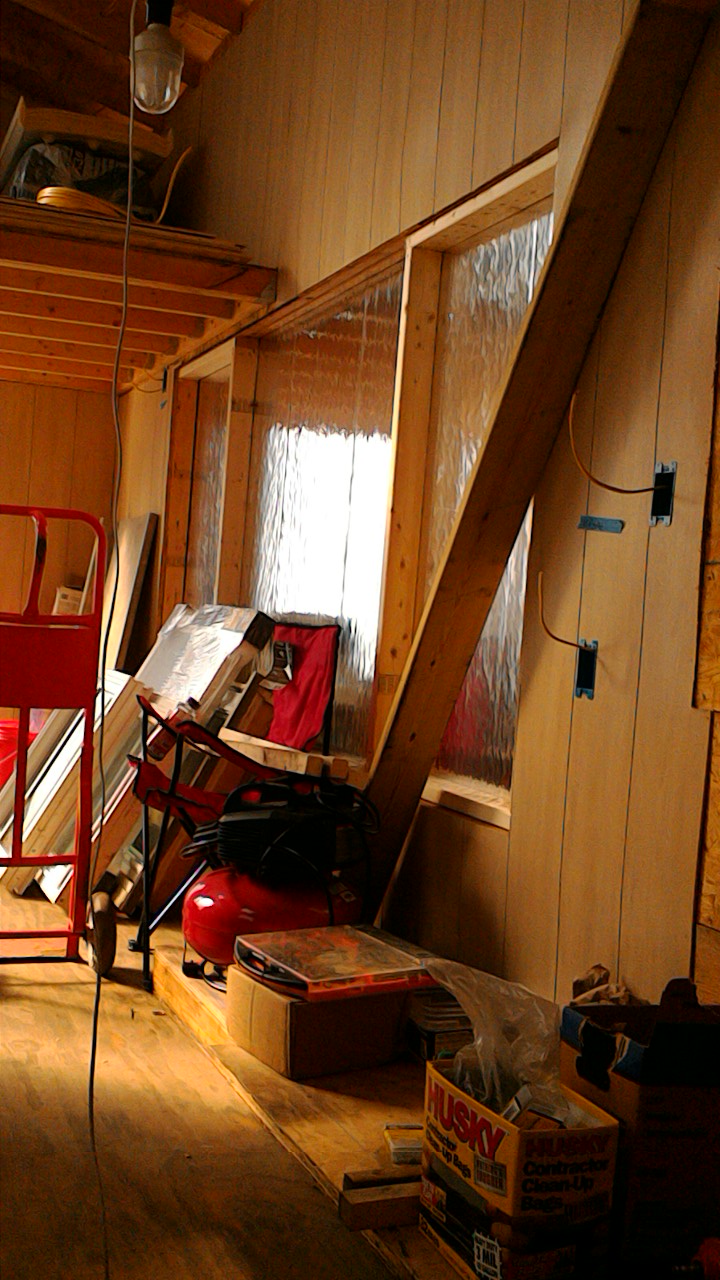
| The back side with Roxul Insulation before the insulation foam board. |
While we were waiting to do electrical or on rainy days we continued with other areas that needed to be started or finished.
I cleaned up our
gutters we got from Craigslist for $25 and they turned out great. I only try to use non-toxic cleaners and decided to try my Shaklee Get Clean plant based products to clean up the guttters. I am a Shaklee distributor, if you would be interested in trying these products feel free to contact me. I have used their products for a few years now and as you can see it turned out really well!
 |
| BEFORE |
 |
| Prepping with Basic H, about 1/2 tsp of Get Clean Laundry Detergent in a bowl with water and my piggy scrubber. |
 |
| First one finished and more dirty ones to go. I was happy with the results and will continue on... |
 |
| BEFORE |
 |
| AFTER |
|
 |
| Installing the gutters |
Next, we began working on the bathroom floor and installing the shower and tub hardware.
 |
| The guy at Home Depot recommended this to prep the plywood so we decided to try it before putting down our stick on tile |
|
 |
| I just poured some on the floor and used a roller to spread it evenly |
 |
| After about an hour or so it was ready to add the tiles |
|
 |
| Sticking down the tiles. I think this is called Copper Slate. |
 |
| Floor is finished. I will try to get a better pic later. It's really hard to take pictures in a tiny house! |
 |
| Shower/Tub hardware installed. Washing Maching box installed. |
 |
| We made a box from scrap plywood and 2x4's to cover the wheel wells. Another piece of plywood will cover this and become the bottom of my cabinets. |
|
 |
| The other side with a finished wheel well cover and cabinetry with sink and countertop. This made my heart happy! |
|
|
|
|
|
|
|
|
|
|
|
|
|
|
|
|
|
|
|
|
|
|
|
|
|
|
|
|
|
| | | | | | | |
|
|
|
|
|
|
|
|
|
|
|
We have made some changes in our plans with the windows, heating, and our bathroom sink. First, after visualizing and lots of discussing we decided to go with a few smaller windows. I needed more wall space and that big window was eating a lot of it! We are a homeschooling family and we love books and have lots of learning materials, such as crafty things, building blocks (Legos, Kinex, etc), science experiement materials, and much more. I can store some of it in a small shed but there is also stuff that I need to have access to regularly.
I went to Habitat for Humanity ReStore to try to find some windows that would fit and in decent condition. It's the small blessings that are rather large for us. I walked in and there was a sign that said "20% off EVERYTHING!" Yay!! I probably could of hugged the cashier when she also told me in case I missed the big sign. Each window was $50 but with 20% off I got them for $40 each. I was able to find every window we needed except for the one above the kitchen sink. It is really hard to find a used window that is 36x36. I scanned every window in the store and ad on Craigslist for a couple of weeks. Our pastor calls my husband the day I arrive with the windows and wants to know if we ever found a window for the kitchen sink area because... he found one for us!! It may just seem like a window to some or a small sale to others but to us it was one of many blessings that we have received throughout this whole project. God will provide.
 |
| Our newer windows and framing to provide more wall space. Our new window area will be two windows in the middle section. The outer two sections will be more needed wall space. |
 |
| Smaller kitchen window to give more added wall space for refrigerator and shelving for food |
My husband has been eyeing the smaller triangle sinks that mount to the wall for our bathroom and they are not a cheap expense. One of these little sinks can run in the hundreds of dollars. I have been watching Craigslist and other stores but never came across one until now. The same day I went to ReStore for the windows this little sink was sitting at the end of the isle with a beacon of light shining on it, well maybe in my eyes, but either way I was excited to see it and it was 20% off of $40. This was a splurge for us but it is going to work perfectly for the vanity area in the bathroom.

Originally, we were going to use the little pot belly stove for our heat but it is another change we decided on recently. After contemplating and more talking, we were worried during the cold winters here that the little stove would only be able to heat for about and hour or two before needing more wood and that could lead to frozen pipes and staying up all night putting wood in the stove. Since we are going with propane water heater and cook stove we decided to look into a propane wall mount heater. The expense and time to install lots of stove pipe, heat reflectors, etc and it would end up being almost $500. I started scanning Craigslist for a propane heater and found a great deal on a 30,000 btu vent free propane wall mount that was used once for $75. This will be much easier to install, we don't have to cut through the roof, and less worry of not having heat when we need it.
 |
| Turned sideways until it is wall mounted to keep from smashing the intake hose |
Last but not least I find an awesome propane cook stove on Craigslist. I was scanning the free section of Craigslist, which I do sometimes just to see if there is anything we need that I didn't think of to add to my notifications. I had propane in my notifications but didn't think to add gas stove! I came across a free slide in gas stove but it didn't say if it was propane or not. I emailed that morning and decided to call the number listed. You know the saying "The early bird gets the worm" well this proved true for me. She told me she had lots of emails to deal with but since I called first, if I wanted it, then it was mine. After confirming with her, it works and it's propane. We found out she moving to Georgia to the same area we used to live in so Georgians' you'll be getting a very nice and generous lady.
Everything is starting to look more house like and as it comes together I am getting more excited about moving and starting our tiny house life. :)